
Eat It
2025

Sourdough Starter from scratch
A Comprehensive Guide to Creating a Sourdough Starter from Scratch: The Sandor Katz Inspired Method
Sourdough starter, also known as a "mother" or "levain," is a living culture of wild yeasts and bacteria that naturally leaven and flavor bread. Creating one from scratch is a rewarding process that connects you to ancient baking traditions. Sandor Katz's philosophy embraces the simplicity and natural magic of fermentation.
The Core Principle: You are creating a hospitable environment for wild yeasts (which are all around us – in the air, on surfaces, and especially on the bran of grains) and beneficial bacteria to thrive. These microorganisms will consume the carbohydrates in flour, producing carbon dioxide (which makes bread rise) and organic acids (which give sourdough its characteristic tangy flavor).
What You'll Need:
A Clean Jar or Non-Reactive Container: Glass is ideal as you can see the activity. A quart-sized (approx. 1 liter) jar is a good starting point. Avoid metal containers, especially aluminum or copper, as they can react with the acidic starter. Stainless steel is generally considered safe if that's all you have.
Flour:
Best Choices for Starting: Whole grain flours like whole wheat or rye are often recommended for starting a starter. They contain more microorganisms and nutrients on the bran and germ, which can help kickstart activity. Organic flours are also a good choice as they are less likely to have been treated with fungicides that could inhibit microbial growth.
Other Options: Unbleached all-purpose flour can also work, though it might take a little longer to show activity.
Avoid: Bleached flour, as the bleaching process can damage the microorganisms needed.
Water:
Best Choices: Filtered, spring, or well water are ideal.
Tap Water: If using tap water, it's best to let it sit out uncovered for at least a few hours, or ideally overnight, to allow any chlorine to dissipate, as chlorine can inhibit microbial growth. Alternatively, you can boil it for a few minutes and let it cool completely.
Optional - For an Initial Boost (Katz's Fruit Suggestion):
A few pieces of unwashed, thin-skinned organic fruit like grapes, plums, berries, or even a piece of apple peel. The waxy bloom on the skin of such fruits is rich in wild yeasts.
A Porous Cover: Cheesecloth, a clean kitchen towel, a coffee filter, or a loosely fitting lid. This allows air to circulate and wild yeasts to enter while keeping out dust and insects.
A Non-Reactive Utensil for Stirring: Wood, silicone, or stainless steel spoon/spatula.
Detailed Step-by-Step Guide:
Phase 1: Initiating the Culture (Days 1-7+ )
This phase is about inviting and cultivating the initial microbial community. Patience is key here; development times can vary greatly depending on your flour, water, ambient temperature, and the specific microorganisms present in your environment.
Day 1: The Initial Mix
Prepare your Jar: Ensure your jar is clean. You don't need to sterilize it, but it should be well-washed.
Combine Flour and Water: In your jar, combine approximately 1/2 cup (around 60g) of your chosen flour with 1/4 cup (around 60g) of non-chlorinated water. Aim for a thick, lump-free batter consistency, like pancake batter or thick paint. Adjust with a little more flour or water if needed. Stir vigorously to incorporate air.
(Optional) Add Fruit: If using, gently add your unwashed fruit pieces into the mixture. Don't chop them finely; a few whole grapes or a slice of plum is fine.
Cover: Cover the jar with your porous material, securing it with a rubber band or the jar's screw band (if using a canning jar, don't use the sealing lid).
Location: Place the jar in a consistently warm spot, ideally between 70-80°F (21-27°C). A kitchen counter, on top of the refrigerator, or in an oven with just the light on (be very careful it doesn't get too hot) can work. Avoid direct sunlight, which can overheat the starter. Good air circulation is also beneficial.
Day 2: Observation and Stirring
Observe: You might not see much activity yet, or you might see a few tiny bubbles. It might smell mostly like wet flour.
Stir: Uncover and stir the mixture vigorously at least once, preferably twice a day. This reincorporates ingredients, introduces oxygen (which some initial desirable microorganisms appreciate), and helps distribute developing cultures. If you added fruit, just stir gently around it.
Days 3-7 (and potentially longer): Waiting for Signs of Life
Continue Stirring: Stir 1-2 times daily.
Observe Closely:
Bubbles: This is the primary sign you're looking for. They might be tiny at first, then become more noticeable. This indicates yeast activity (carbon dioxide production).
Aroma: The smell will change. Initially, it might smell a bit "off" or overly pungent (sometimes like old cheese or smelly socks). This is often due to different types of bacteria competing. Don't be discouraged! As the desirable lactic acid bacteria (LAB) take hold, the aroma should evolve into something more pleasantly sour, yeasty, fruity, or even vinegary. A "hooch" (a layer of liquid on top) might form, which can smell alcoholic or like nail polish remover. This is normal; just stir it back in.
Expansion (Rise and Fall): Eventually, you may see the starter increase in volume after stirring/feeding, and then fall back down.
First "Feeding" (once definite activity is observed):
Once you see consistent small bubbles and a noticeably changed, perhaps pleasantly sour or yeasty aroma (this might be anywhere from day 3 to day 7, or even longer in cooler environments), it's time for the first "refreshment" or feeding.
If you added fruit, strain it out and discard it now.
Discard about half of your initial mixture. This might seem wasteful, but it's important to keep the acidity in check and ensure the microorganisms have enough fresh food.
Add fresh flour and water, similar to your initial amounts: roughly 1/4 cup (30g) flour and 2 tablespoons (30g) water. Mix well. The consistency should again be like a thick batter.
The idea of "a few more days until you have a thick, bubbly batter" from the original instructions fits here. This "feeding" step is what refines the culture.
Phase 2: Establishing and Strengthening the Starter (Daily Feedings)
Once you've seen initial activity and performed the first feeding (after removing fruit), you move into a routine of regular feedings to strengthen the yeast and bacteria populations.
Daily Routine (or Twice Daily if very active and warm):
Observe: Look for bubbles, expansion, and note the aroma. A healthy, active starter will typically rise predictably after feeding and have a pleasant, tangy smell.
Discard (or Use/Save): Before each feeding, you'll need to discard a portion of the starter. A common practice is to keep about 1/4 to 1/2 cup of starter (e.g., 50-60g) and discard the rest. (The discard can be saved in the fridge and used in recipes like pancakes, waffles, or crackers).
Feed: To the remaining starter, add fresh flour and water. A common ratio is 1:1:1 by weight (starter:flour:water). For example, if you kept 50g of starter, you would add 50g of flour and 50g of water. If you're measuring by volume, this could be something like keeping 1/4 cup of starter and adding 1/4 cup of flour and slightly less than 1/4 cup of water (around 2-3 tablespoons) to maintain a thick batter consistency.
Mix: Stir vigorously.
Cover and Wait: Place it back in its warm spot.
What to Expect:
Over several days to a week (or more) of consistent feedings, your starter should become more predictable. It should ideally double (or more) in volume within 4-8 hours after feeding (this time can vary based on temperature).
The aroma should be distinctly sour and yeasty, but pleasant.
The texture will be bubbly and airy at its peak.
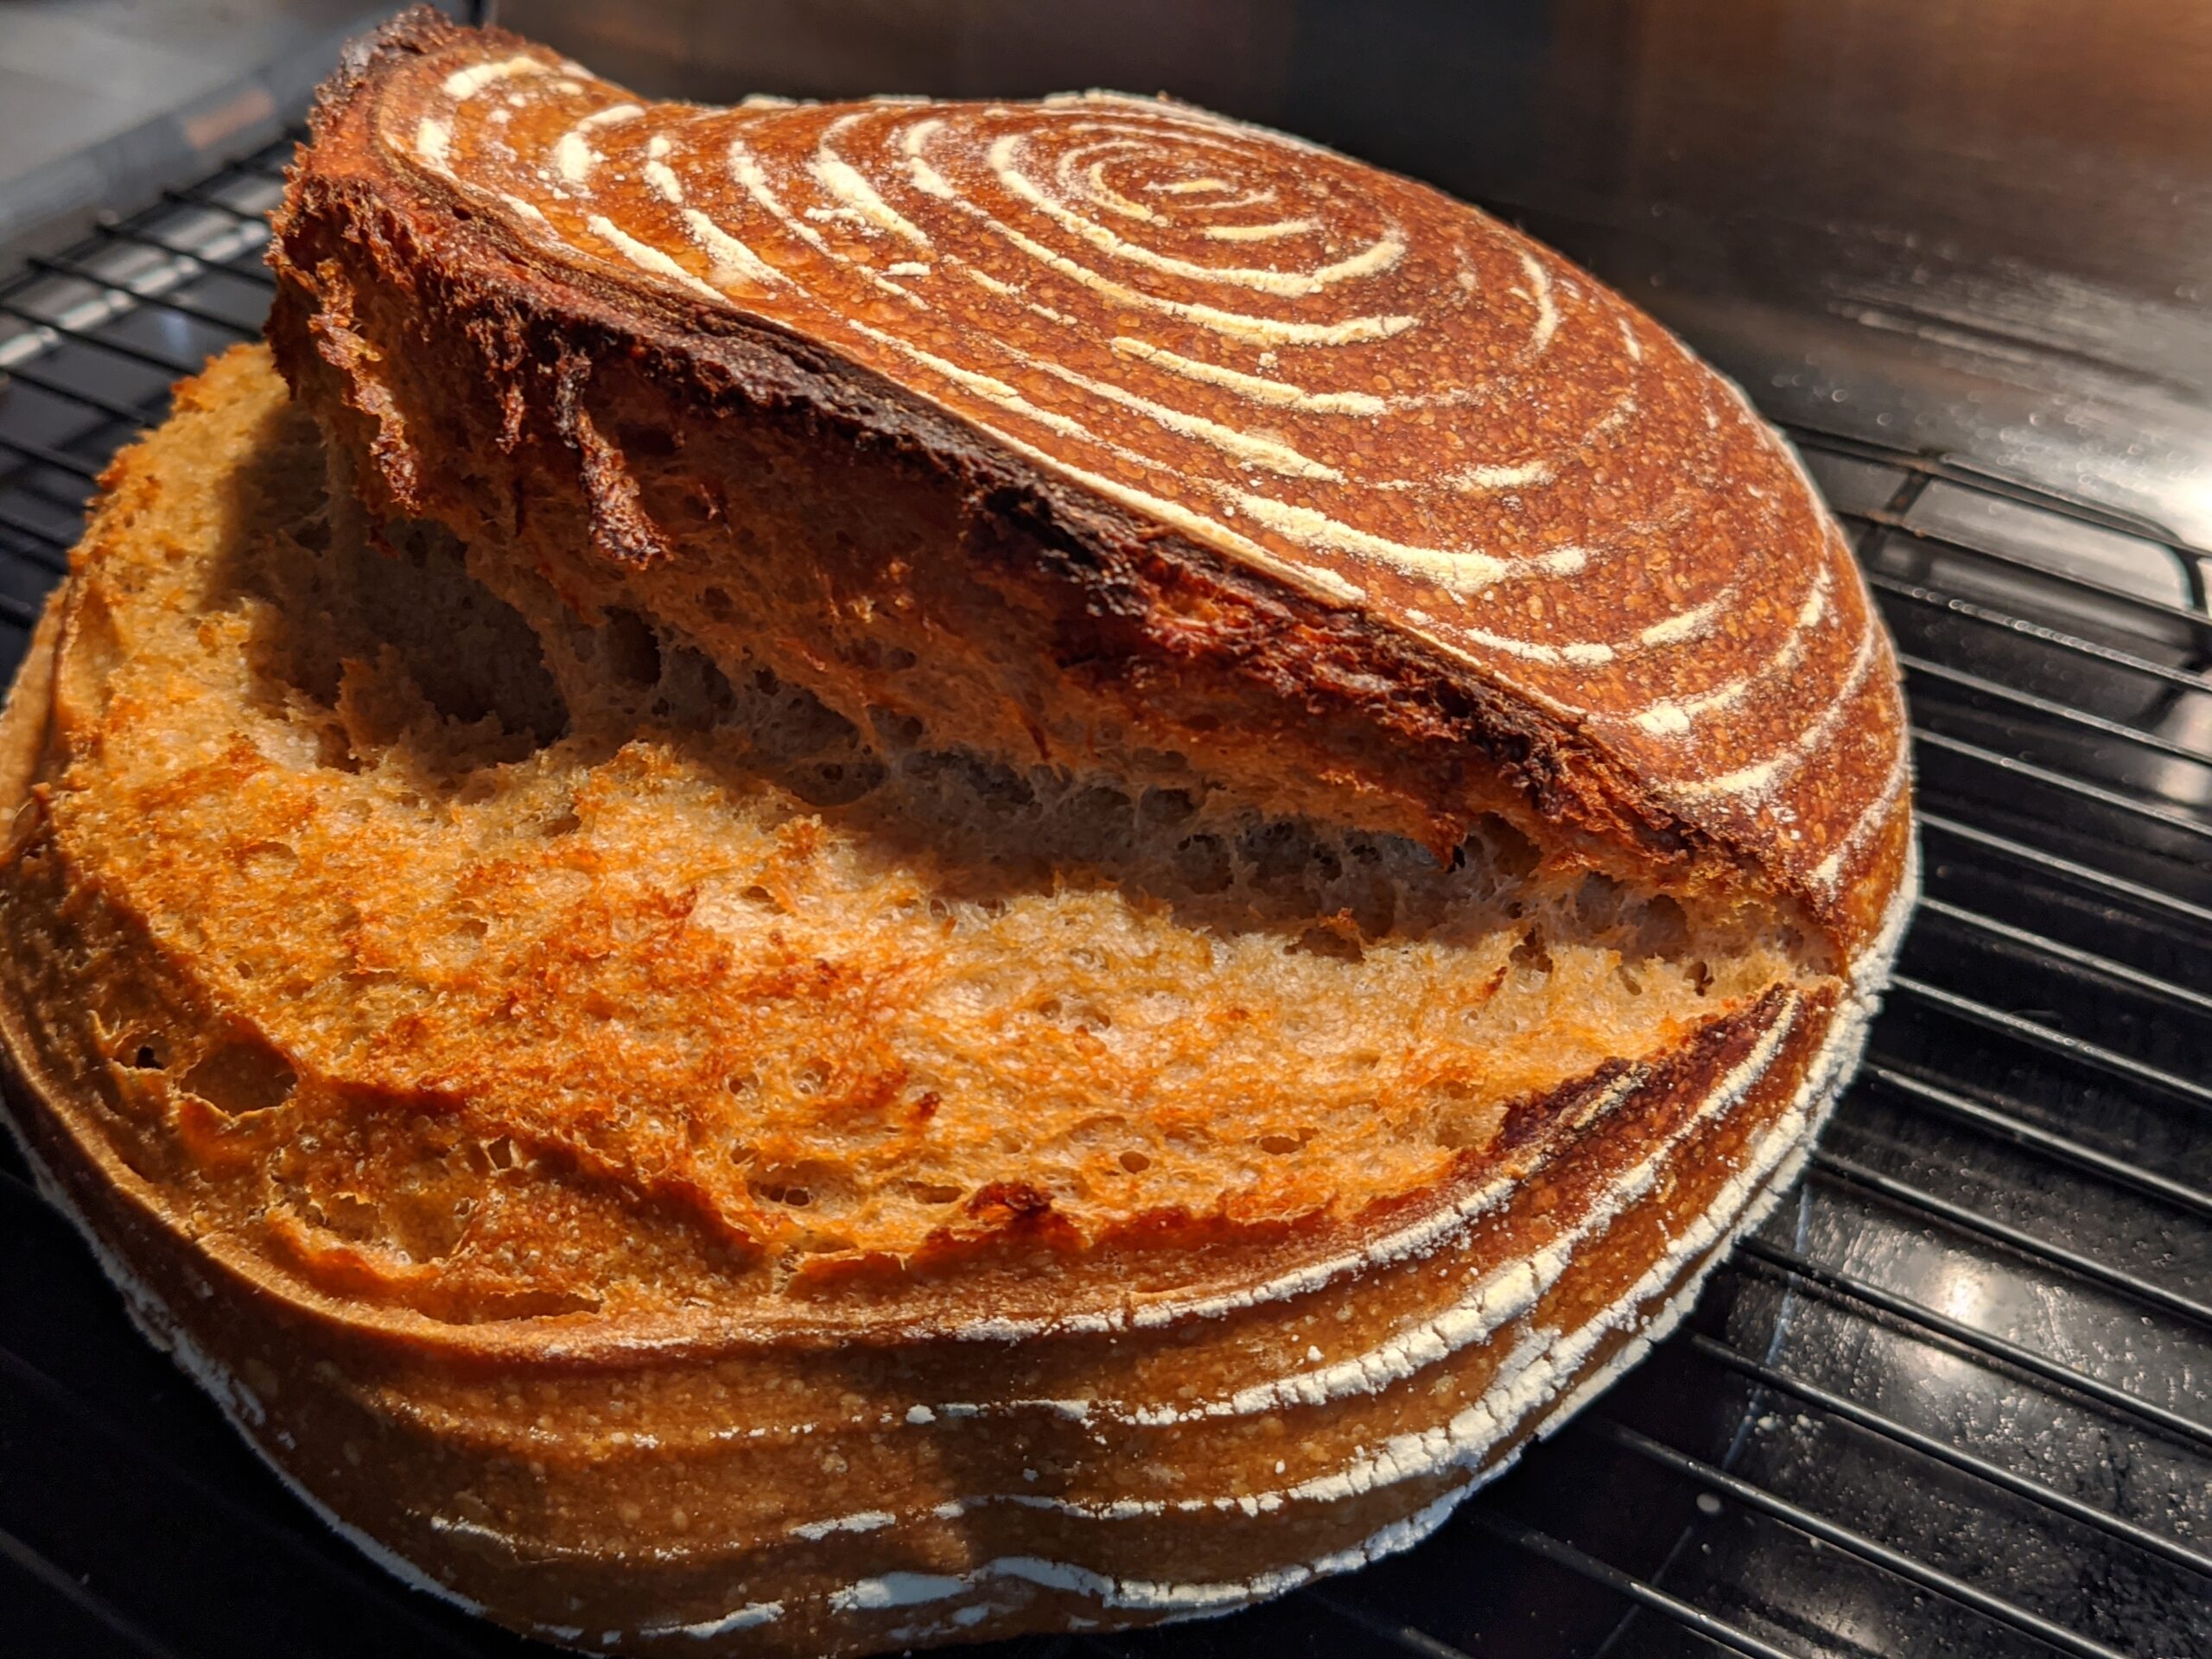
When is it Ready?
Your starter is generally considered "ready to use" for baking when:
It reliably doubles or triples in volume within a few hours (e.g., 4-8 hours) after feeding at room temperature (around 70-75°F or 21-24°C).
It is full of bubbles, both large and small.
It has a pleasant, tangy, yeasty aroma (not an off-putting or overly "bad" smell).
The Float Test (Optional but common): Drop a small spoonful of active starter into a glass of water. If it floats, it's generally considered ready and airy enough to leaven bread. However, some perfectly good starters may not float, so don't rely on this exclusively.
This whole process, from Day 1 to a reliably active starter, can take anywhere from 7 to 14 days, sometimes longer, sometimes a bit shorter.
Phase 3: Maintaining Your Mature Starter
Once your starter is robust and predictable, you have a few options for maintaining it:
Room Temperature Maintenance (If you bake frequently, e.g., several times a week):
Keep the starter on your counter.
Feed it once or twice a day, following the discard and feed routine. Twice-a-day feedings (every 12 hours) will keep it very vigorous. Once-a-day (every 24 hours) is also common.
Refrigerator Maintenance (If you bake less frequently, e.g., once a week or less):
Feed your starter. Let it sit at room temperature for a few hours (2-4 hours) to get active.
Then, cover it tightly and place it in the refrigerator.
The cold temperature will slow down fermentation significantly.
You'll need to take it out and feed it at least once a week. To do this:
Remove it from the fridge.
If there's hooch, you can stir it in or pour it off (stirring it in will make it more sour).
Discard a portion and feed it as usual.
Let it sit at room temperature to become active (it might take a couple of feeding cycles to become fully vigorous again if it's been in the fridge for a while). If you plan to bake, you might do 2-3 feedings at room temperature over 12-24 hours before using it.
Once active, you can use it for baking or return it to the fridge after a few hours at room temperature post-feeding.
Important Considerations & Tips for Success (Sandor Katz Style and General Wisdom):
Trust Your Senses: Your nose is one of your best tools. The aroma of the starter will tell you a lot about its health and activity. It should evolve from just floury to potentially funky, and finally to pleasantly sour and yeasty.
Temperature is Key: Yeast and bacteria activity is highly temperature-dependent. Warmer temperatures (within the ideal range) speed up fermentation; cooler temperatures slow it down. If your kitchen is cold, your starter will develop more slowly.
Consistency of Flour and Water: While Sandor Katz emphasizes flexibility, using the same type of flour and water consistently during the initial development can help establish a stable culture more quickly. Once mature, starters are often more resilient to changes.
"Hooch": The liquid layer that can form on top is called hooch. It's a byproduct of fermentation and indicates your starter is hungry. It's usually alcoholic and can be stirred back in (for a more sour flavor) or poured off before feeding. Frequent hooch formation means you might need to feed your starter more often or with a higher ratio of fresh flour and water.
Mold:
White, "fuzzy" mold: If you see small amounts of white mold that isn't deeply embedded, you can try to carefully scrape it off, along with a good margin of the starter underneath, and transfer a clean portion from the very bottom of the jar to a new clean jar and feed it. Monitor it closely.
Colored Mold (Pink, Orange, Green, Black): This is a bad sign. If you see pink, orange, or fuzzy black/green mold, it's best to discard the entire starter and begin again. These can indicate harmful bacteria. This is why ensuring good airflow and a clean environment is important.
Activity Lulls: It's common for starters to show a burst of activity in the first few days (sometimes due to bacteria other than the desired sourdough yeasts and LAB), and then appear to go dormant or "die" for a few days (often around days 3-5). This is often a phase where the pH is dropping, and the desired yeasts and lactic acid bacteria are working to become the dominant cultures. Don't give up! Keep stirring and then resume feeding once activity (even slight) reappears or after a couple of days of no activity.
Don't Be Afraid to Experiment (Once Established): Once your starter is mature and robust, you can experiment with feeding it different types of flours to influence the flavor of your bread. Rye makes it more sour; wheat can be milder.
No Need for Commercial Yeast: The whole point is to cultivate wild yeasts. Adding commercial yeast will outcompete the wild strains you are trying to nurture.
Patience is a Virtue: This is a natural process. Some starters spring to life quickly; others take their time. Be patient, observe, and adjust your care as needed. The environment in your kitchen, the flour you use, and even the season can affect the process.
By following these steps, inspired by Sandor Katz's approach of working with natural cultures, you'll be well on your way to creating a vibrant, active sourdough starter ready for baking delicious, naturally leavened bread. Enjoy the journey!
2021
How to Make Fermented Salsa (A Probiotic-Rich Recipe)
If you’ve ever had a mountain of ripe tomatoes from the garden, you know that fresh salsa is a must. But have you ever tried fermenting it? Fermented salsa is a game-changer in our house. It develops a complex, tangy flavor that’s incredibly delicious, and the fermentation process makes it a naturally probiotic-rich food.
Best of all, you can completely customize it based on what’s abundant in your garden and how much heat you like. This recipe is more of a method than a strict rule, so feel free to experiment!
Easy Fermented Garden Salsa
Prep time: 20 minutes Fermenting time: 2-5 days Yields: Approx. 1 quart
Ingredients
4-5 cups chopped ripe tomatoes (about 2 lbs)
1 large white or yellow onion, chopped
2-4 jalapeños or other hot peppers, minced (use more or less depending on desired heat)
4-6 cloves of garlic, minced
1/2 cup chopped fresh cilantro
Juice of 1 lime
2 teaspoons non-iodized salt (sea salt or kosher salt)
Optional: 1/4 cup whey or brine from a previous ferment (helps kickstart the process)
Instructions
Combine Ingredients: In a large bowl, combine the chopped tomatoes, onion, jalapeños, garlic, cilantro, and lime juice. Sprinkle the salt over the top and stir everything together thoroughly.
Pack the Jar: Transfer the salsa mixture into a clean quart-sized jar. Use a spoon or tamper to press the mixture down firmly. You want the solids to be submerged in their own liquid brine.
Add a Starter (Optional): If you are using whey or starter brine, pour it over the top now.
Weigh it Down: It’s important to keep the vegetables below the brine to prevent mold. You can use a fermentation weight, a small glass jar that fits inside the mouth of the larger jar, or even a clean plastic bag filled with a bit of water. Leave at least an inch of headspace at the top of the jar.
Ferment: Place a lid on the jar loosely (or use an airlock). Set the jar on a plate to catch any overflow and let it ferment at room temperature, away from direct sunlight, for 2 to 5 days.
Taste and Refrigerate: You will see bubbling within a day or two. Start tasting the salsa after day 2. Once it has reached a flavor and tanginess you enjoy, tighten the lid and move it to the refrigerator. It will continue to slowly ferment in the fridge, but its flavor will be preserved for several weeks.
Recipe Notes
No Whey?: Don’t worry if you don’t have whey or starter brine! The salsa will still ferment perfectly fine on its own; it might just take an extra day to get going.
Brine Level: If your tomatoes aren’t very juicy, you may need to add a small amount of extra brine (1 teaspoon salt dissolved in 1 cup of water) to ensure everything stays submerged.
What “Bubbling” Means in Fermentation (A Simple Pickle Recipe)
As the Pacific Northwest gardening season winds down, our focus shifts from the garden beds to the kitchen counter. The harvest is in, and now the quiet, magical work of preservation begins. One of our favorite methods is lacto-fermentation, and there's no better visual for this living process than a jar of pickles, happily bubbling away.
Many people who are new to fermenting get nervous when they see this activity. Is it safe? Is it supposed to do that? The answer is a resounding YES! Those bubbles are the sign of a healthy, successful ferment.
Why Are My Fermented Pickles Bubbling?
The bubbling you see is actually the release of carbon dioxide. It's a byproduct created by the hardworking bacteria (specifically, Lactobacillus) as they consume the natural sugars in the cucumbers and vegetables.
Think of it this way:
You create a saltwater brine, which protects the cucumbers from harmful bacteria.
The beneficial Lactobacillus bacteria, which are naturally present on the vegetables, thrive in this salty environment.
As they eat the sugars, they produce lactic acid (which gives fermented pickles their tangy flavor and preserves them) and carbon dioxide (which creates the bubbles).
So, when you see those bubbles, give yourself a pat on the back. It means your ferment is alive and well, creating a delicious, probiotic-rich food right on your countertop.
Our Simple Fermented Pickle Recipe
Want to see this magic in your own kitchen? Here is our basic, go-to recipe for crunchy, tangy fermented pickles.
Ingredients
Pickling cucumbers, enough to fill a half-gallon jar
6-8 cloves of garlic, peeled
A large handful of fresh dill
1 tablespoon peppercorns
Optional: 1-2 bay leaves, a few hot peppers for spice
4 tablespoons non-iodized salt (sea salt or canning salt)
2 quarts of non-chlorinated water
Instructions
Make the Brine: Dissolve the 4 tablespoons of salt in the 2 quarts of water.
Pack the Jar: Place the garlic, dill, and other spices in the bottom of a clean half-gallon jar. Tightly pack your cucumbers into the jar.
Cover with Brine: Pour the salt brine over the cucumbers until they are completely submerged.
Weigh it Down: Use a fermentation weight or a small jar to keep the cucumbers below the brine.
Ferment: Cover the jar with a loose lid or an airlock and let it ferment at room temperature for 5-10 days. You'll see bubbling start within a couple of days.
Store: Once the pickles reach a tanginess you like, move them to the refrigerator to store.
Our Favorite Fermented Dill Pickle Recipe (The Perfect Crunchy Pickle)
Some years, the garden just decides to give you a gift. This year, for us, that gift was cucumbers. And more cucumbers. Thanks to a perfect PNW summer, our Boston Pickling and White Wonder vines were incredibly productive, and every day brought a new harvest.
When you're swimming in cucumbers, there's only one thing to do: make lots and lots of pickles! Our preferred method is lacto-fermentation. It's a simple, ancient technique that creates a delicious, crunchy, and probiotic-rich pickle that will last in the fridge for months, seeing us through the winter.
Over the years, we've refined our method for the perfect fermented dill pickle. We even found a wonderful local salt from San Juan Island Sea Salt to make our ferments truly a product of the Pacific Northwest. Here is our go-to recipe.
Classic Fermented Dill Pickles
Prep time: 20 minutes Fermenting time: 5-14 days Yields: 1 half-gallon jar
Ingredients
2.5 - 3 lbs pickling cucumbers, washed well
6-8 cloves of garlic, lightly smashed
1 large handful of fresh dill heads or fronds
1 tbsp whole black peppercorns
1 tbsp mustard seeds
Optional: a few grape, oak, or horseradish leaves (the tannins help keep pickles crunchy!)
4 tablespoons non-iodized sea salt (we love using San Juan Island Sea Salt)
2 quarts non-chlorinated water
Instructions
Prepare the Cucumbers: For the crunchiest pickles, it's best to trim off the blossom end of each cucumber. You can also soak the cucumbers in an ice water bath for 30-60 minutes before jarring.
Pack the Jar: In the bottom of a clean half-gallon jar, place half of your dill and garlic, along with the peppercorns and mustard seeds. Tightly pack the cucumbers into the jar, standing them vertically if possible. As you fill the jar, add the remaining dill and garlic.
Add Tannins (Optional): If you are using a grape or oak leaf, tuck it into the side of the jar.
Make the Brine: In a separate pitcher, thoroughly dissolve the 4 tablespoons of salt in the 2 quarts of water.
Cover and Weigh Down: Pour the salt brine over the cucumbers until they are completely submerged, leaving about 1-2 inches of headspace at the top. It's crucial that all the cucumbers stay below the brine. Use a fermentation weight or a small glass jar to keep them submerged.
Ferment: Cover the jar with an airlock lid or a loose-fitting lid. Place the jar on a plate (to catch any overflow) at room temperature and out of direct sunlight for 5 to 14 days. You'll see bubbling begin within a couple of days.
Taste and Store: Start tasting a pickle after day 5. When they reach a flavor you enjoy, they're ready. Move the jar to the refrigerator to halt the fermentation process. They will keep for several months in the fridge.
Tips for Crunchy Pickles
Use Fresh Cucumbers: The fresher, the better. Use your cucumbers within a day of harvesting if possible.
Trim the Blossom End: This end contains an enzyme that can cause mushy pickles.
Add Tannins: Grape leaves, oak leaves, horseradish leaves, or even black tea leaves contain tannins that help preserve crispness.
2020
No-Waste Recipe: How to Make Kimchi from Beet Greens
On a busy homestead, it's easy for the compost bin to fill up quickly during the peak of the harvest season. But I'm always looking for ways to use every part of the plant, and one of my favorite "no-waste" discoveries is using beet tops.
Instead of composting those beautiful, nutritious beet greens, I decided to try fermenting them into a vibrant, crunchy kimchi. The experiment was a huge success! The result is a beautifully colored ferment packed with flavor from garlic and ginger. It's a fantastic way to turn something you might have thrown away into a delicious, probiotic-rich side dish.
This recipe is a simple, non-traditional take on kimchi, focusing on the core ingredients to let the unique flavor of the beet greens shine through.
Beet Green Kimchi (A Simple No-Waste Recipe)
Prep time: 20 minutes
Fermenting time: 3-7 days
Yields: 1 quart jar
Ingredients
1 large bunch of beet greens and tender stems (from about 6-8 beets), thoroughly washed
2-3 tablespoons kosher salt or sea salt
4-5 cloves of garlic, minced
1 tablespoon fresh ginger, minced or grated
Optional: 1-2 tablespoons Gochugaru (Korean chili flakes) for heat
Optional: 1 sliced scallion or a handful of chives
Instructions
Wash and Chop: Thoroughly wash the beet greens and stems to remove all dirt and grit. Roughly chop them into 1-2 inch pieces.
Salt the Greens: In a large bowl, toss the chopped beet greens and stems with the kosher salt. Gently massage the salt into the greens for a few minutes until they begin to wilt and release their liquid. Let them sit for about 20-30 minutes.
Create the Paste: While the greens are wilting, mix your minced garlic and ginger in a small bowl. If you're using Gochugaru for spice, mix it in here as well.
Combine Everything: Do not rinse the greens. The liquid they released is your brine. Add the garlic-ginger paste (and optional scallions) to the bowl with the wilted greens and mix everything together thoroughly with your hands.
Pack the Jar: Tightly pack the kimchi mixture into a clean quart-sized jar, pressing down firmly to ensure the greens are submerged in their own brine. Leave at least an inch of headspace at the top.
Ferment: Place a lid on the jar loosely (do not tighten it all the way) or use an airlock lid. Set the jar on a plate or in a shallow bowl to catch any potential overflow. Let it ferment at room temperature, away from direct sunlight, for 3 to 7 days.
Taste and Store: Start tasting it after day 3. Once it reaches a tanginess you enjoy, tighten the lid and move it to the refrigerator to slow the fermentation. It will keep in the fridge for several months.
Recipe Notes
Burp the Jar: If you aren't using an airlock, you will need to "burp" the jar once a day by briefly unscrewing the lid to release the built-up fermentation gasses.
Keep it Submerged: It's important that the greens stay below the level of the brine to prevent mold. You can use a fermentation weight or a small, clean rock to help keep everything submerged if needed.
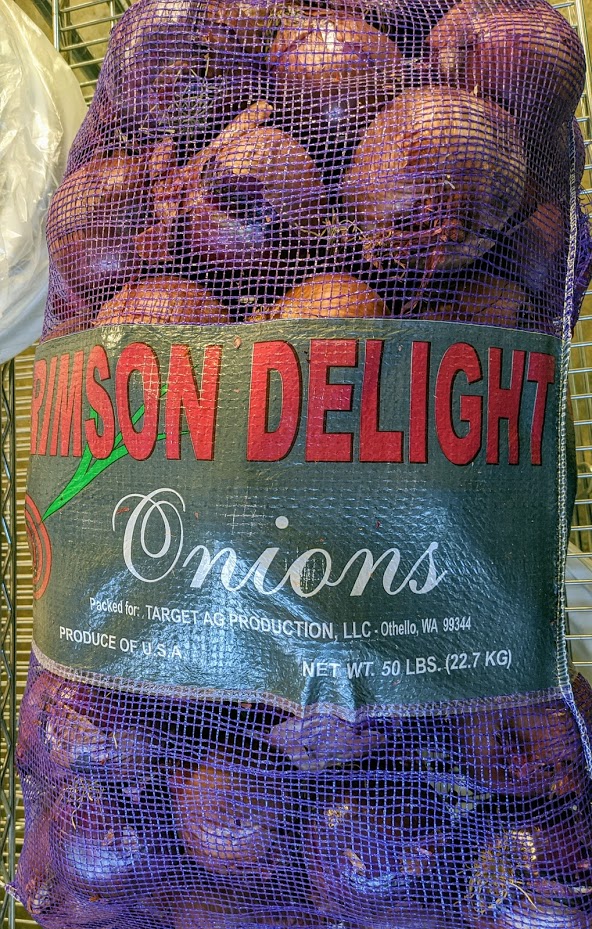
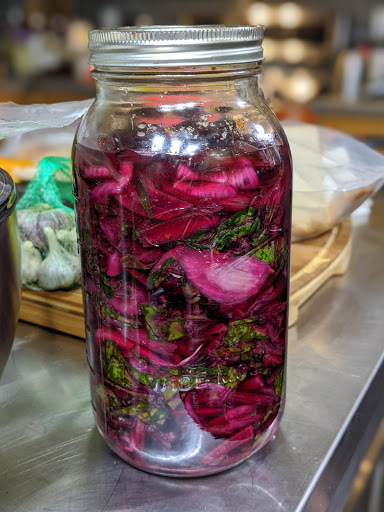
ONIONS!!
We have a local couple that has decided to help us all support the farmers on the east side of Washington that have a surplus of produce that they cannot get rid of. So we got 50 pounds of red onions for $10! We have turned most of them into fermented onions and pickled onions of several flavors including some with turmeric which are awesome. We will be enjoying these onions for months to come.
2019
Bread!
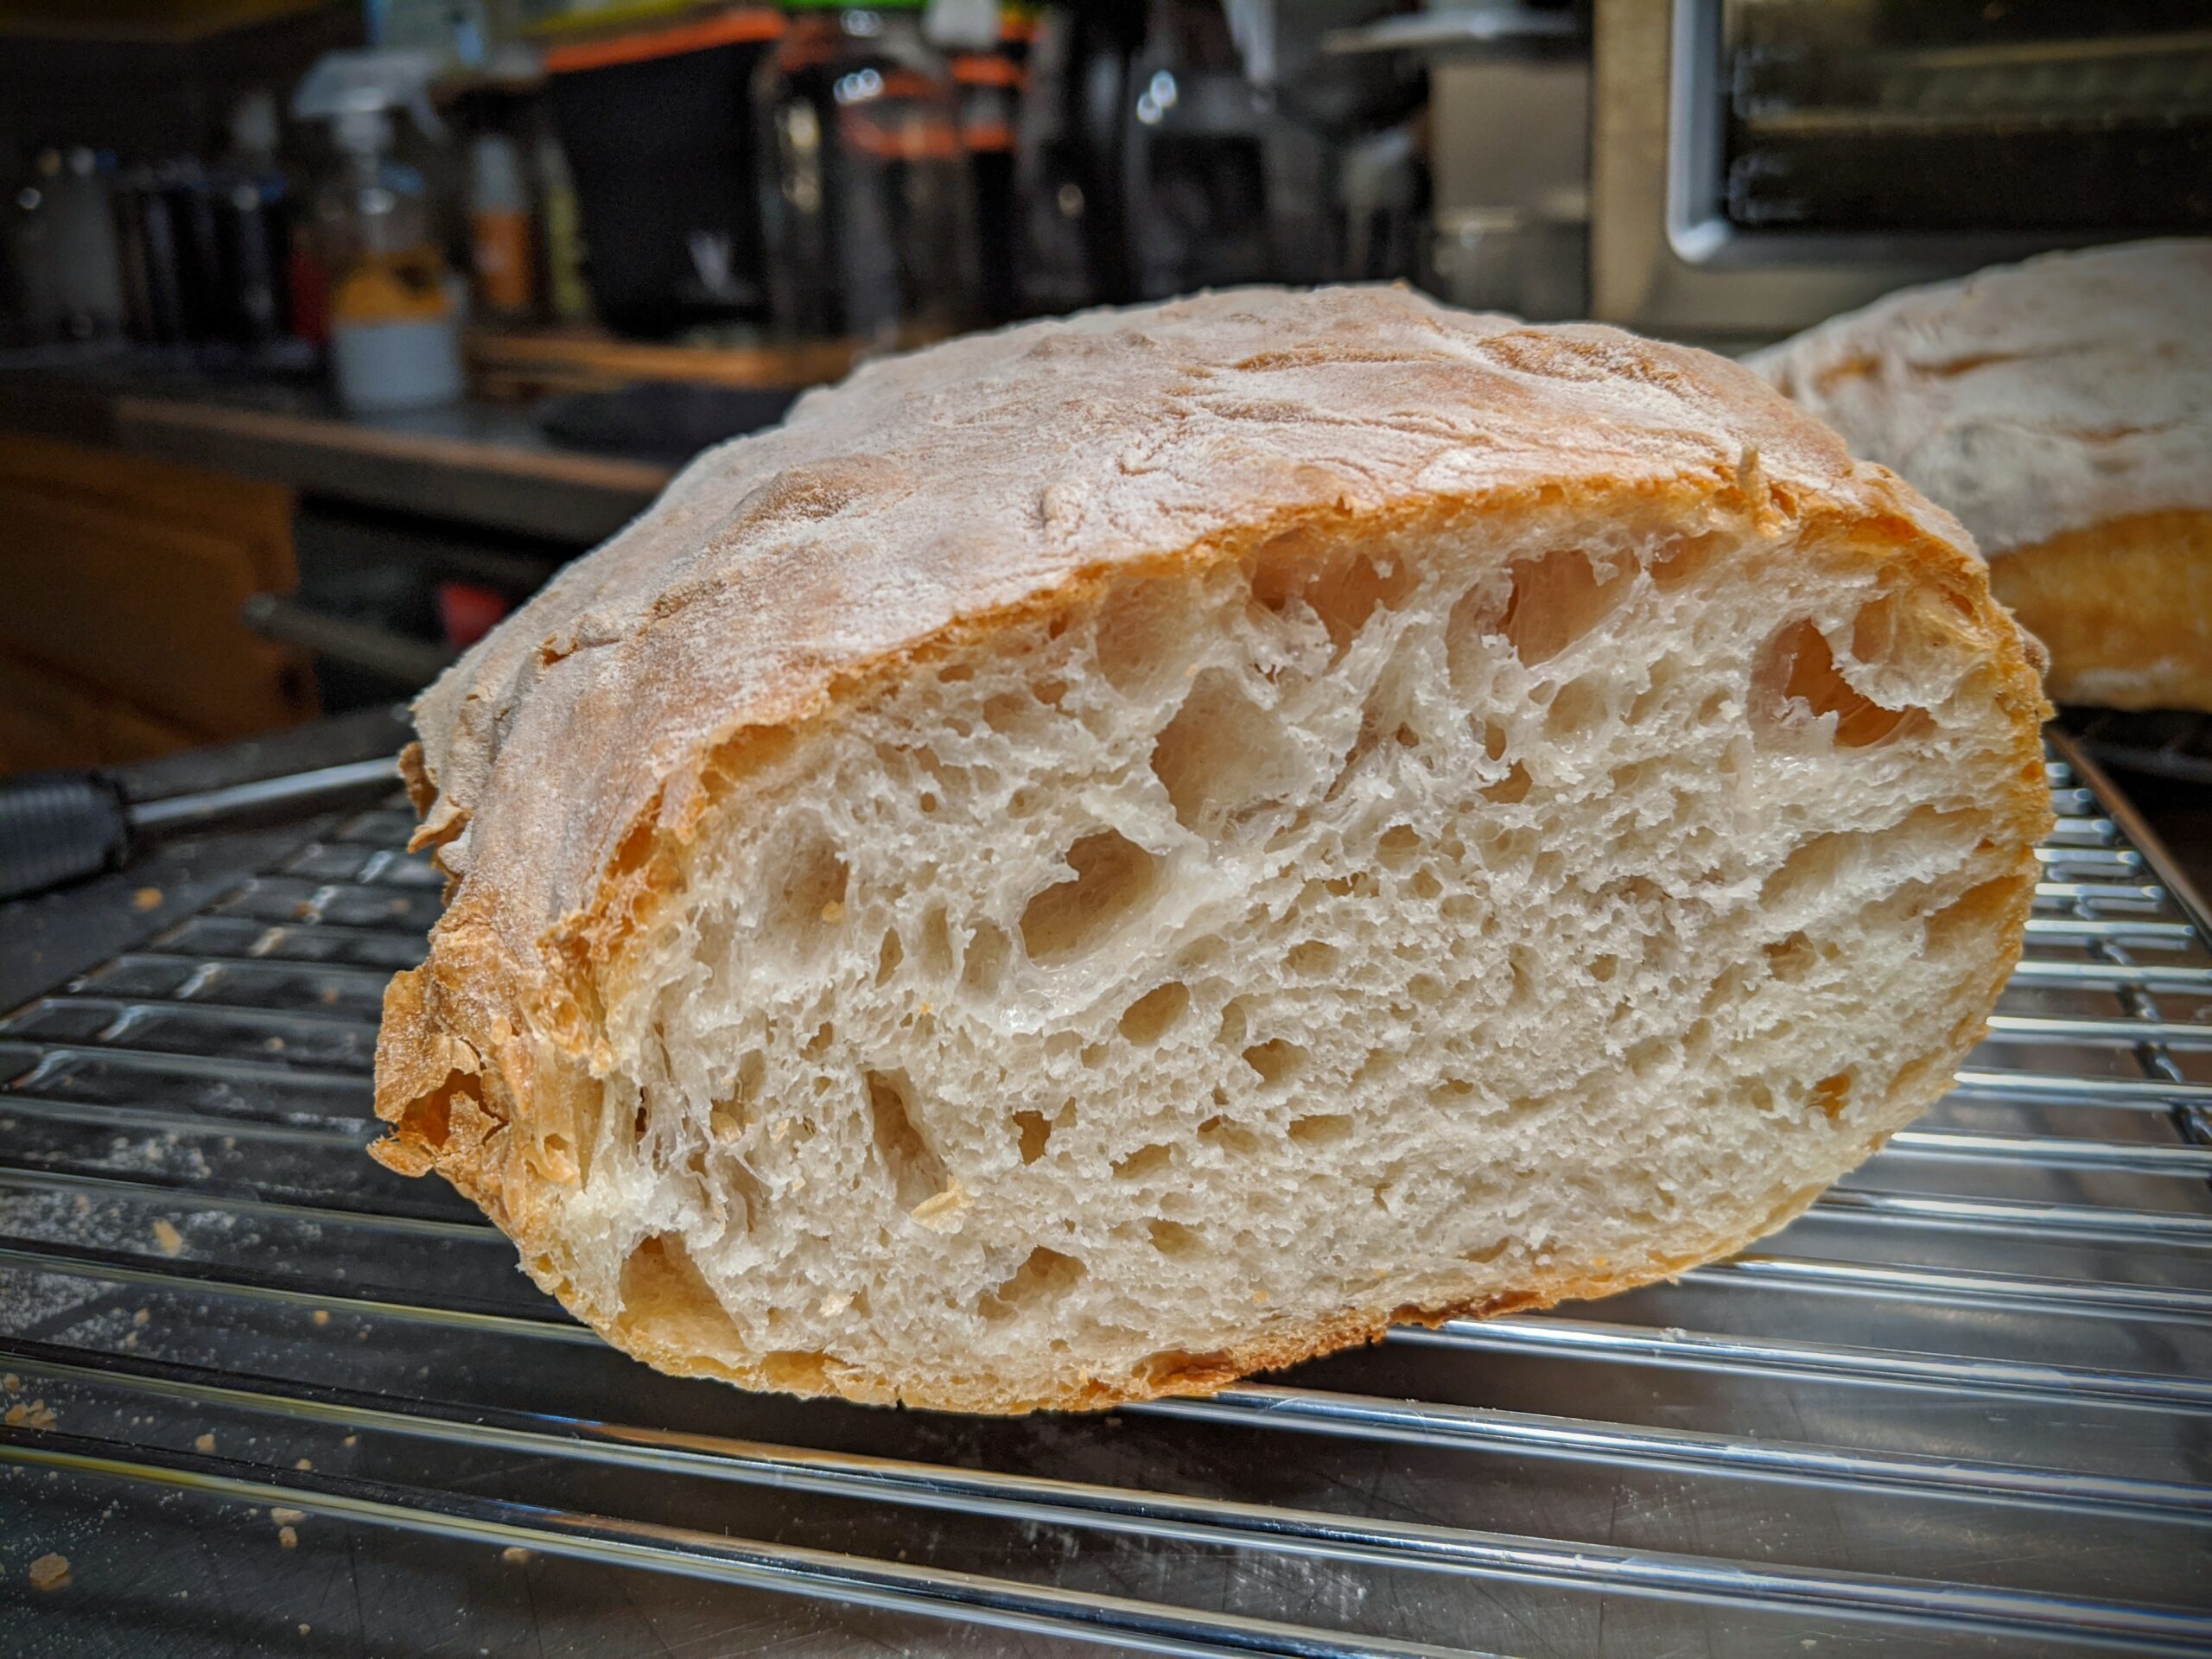
With the shorter, colder days ahead, here's some Ciabatta bread we made today!
I was intrigued and challenged with the article by William Rubel in the most recent edition of Mother Earth News (December 2019/January 2020). I had always wanted to try making Ciabatta but was always a little intimidated by the end product. After all it looked like something that must be difficult, if not impossible, to achieve.
I was pleasantly surprised, the recipe was easy to follow and the resulting bread was just as delightful as I wanted it to be. Crunchy exterior with a firm yet bubble filled interior, a perfect Ciabatta if I do say so myself.
It provided a warm and comforting addition to a cold November day in the Pacific Northwest.
Thank you Mother Earth News and William Rubel!
#MotherEarthNews #Ciabatta #Bread
Busy Summer Continues
The busy summer continues here in the Pacific Northwest. As other parts of the US are winding down in the garden department we are just now going strong with harvesting.
Things have been crazy here this summer with more varieties of plants to try but more pest pressure than we have had in years past.
The leaf miner battle with the spinach, chard and beets has been a battle of wills for sure. Next year we will use row covers more to try to keep them from taking hold.
Same for the cabbage loopers that tried to destroy the cabbage and brussel sprouts.
But the nasturtiums have done their job and the black aphids have been drawn to them instead of destroying other crops in the garden.
We would definitely advise the potager or kitchen style garden with the mix of flowers and veggies as the companion planting really does benefit all of the crops and gives you plenty of pretty flowers to enjoy as well.
We have found that sharing the bounty of the garden and the products we make from it to be a pleasure and a way to spread the philosophy of fermentation.
We love the fermented products we are able to make from the garden veggies and the possibilities and combinations are endless.
Enjoy the pictures below of the harvest from today and the 3 liters of salsa that I started with just today's' tomatoes. In a few days we will have more salsa to enjoy and share!
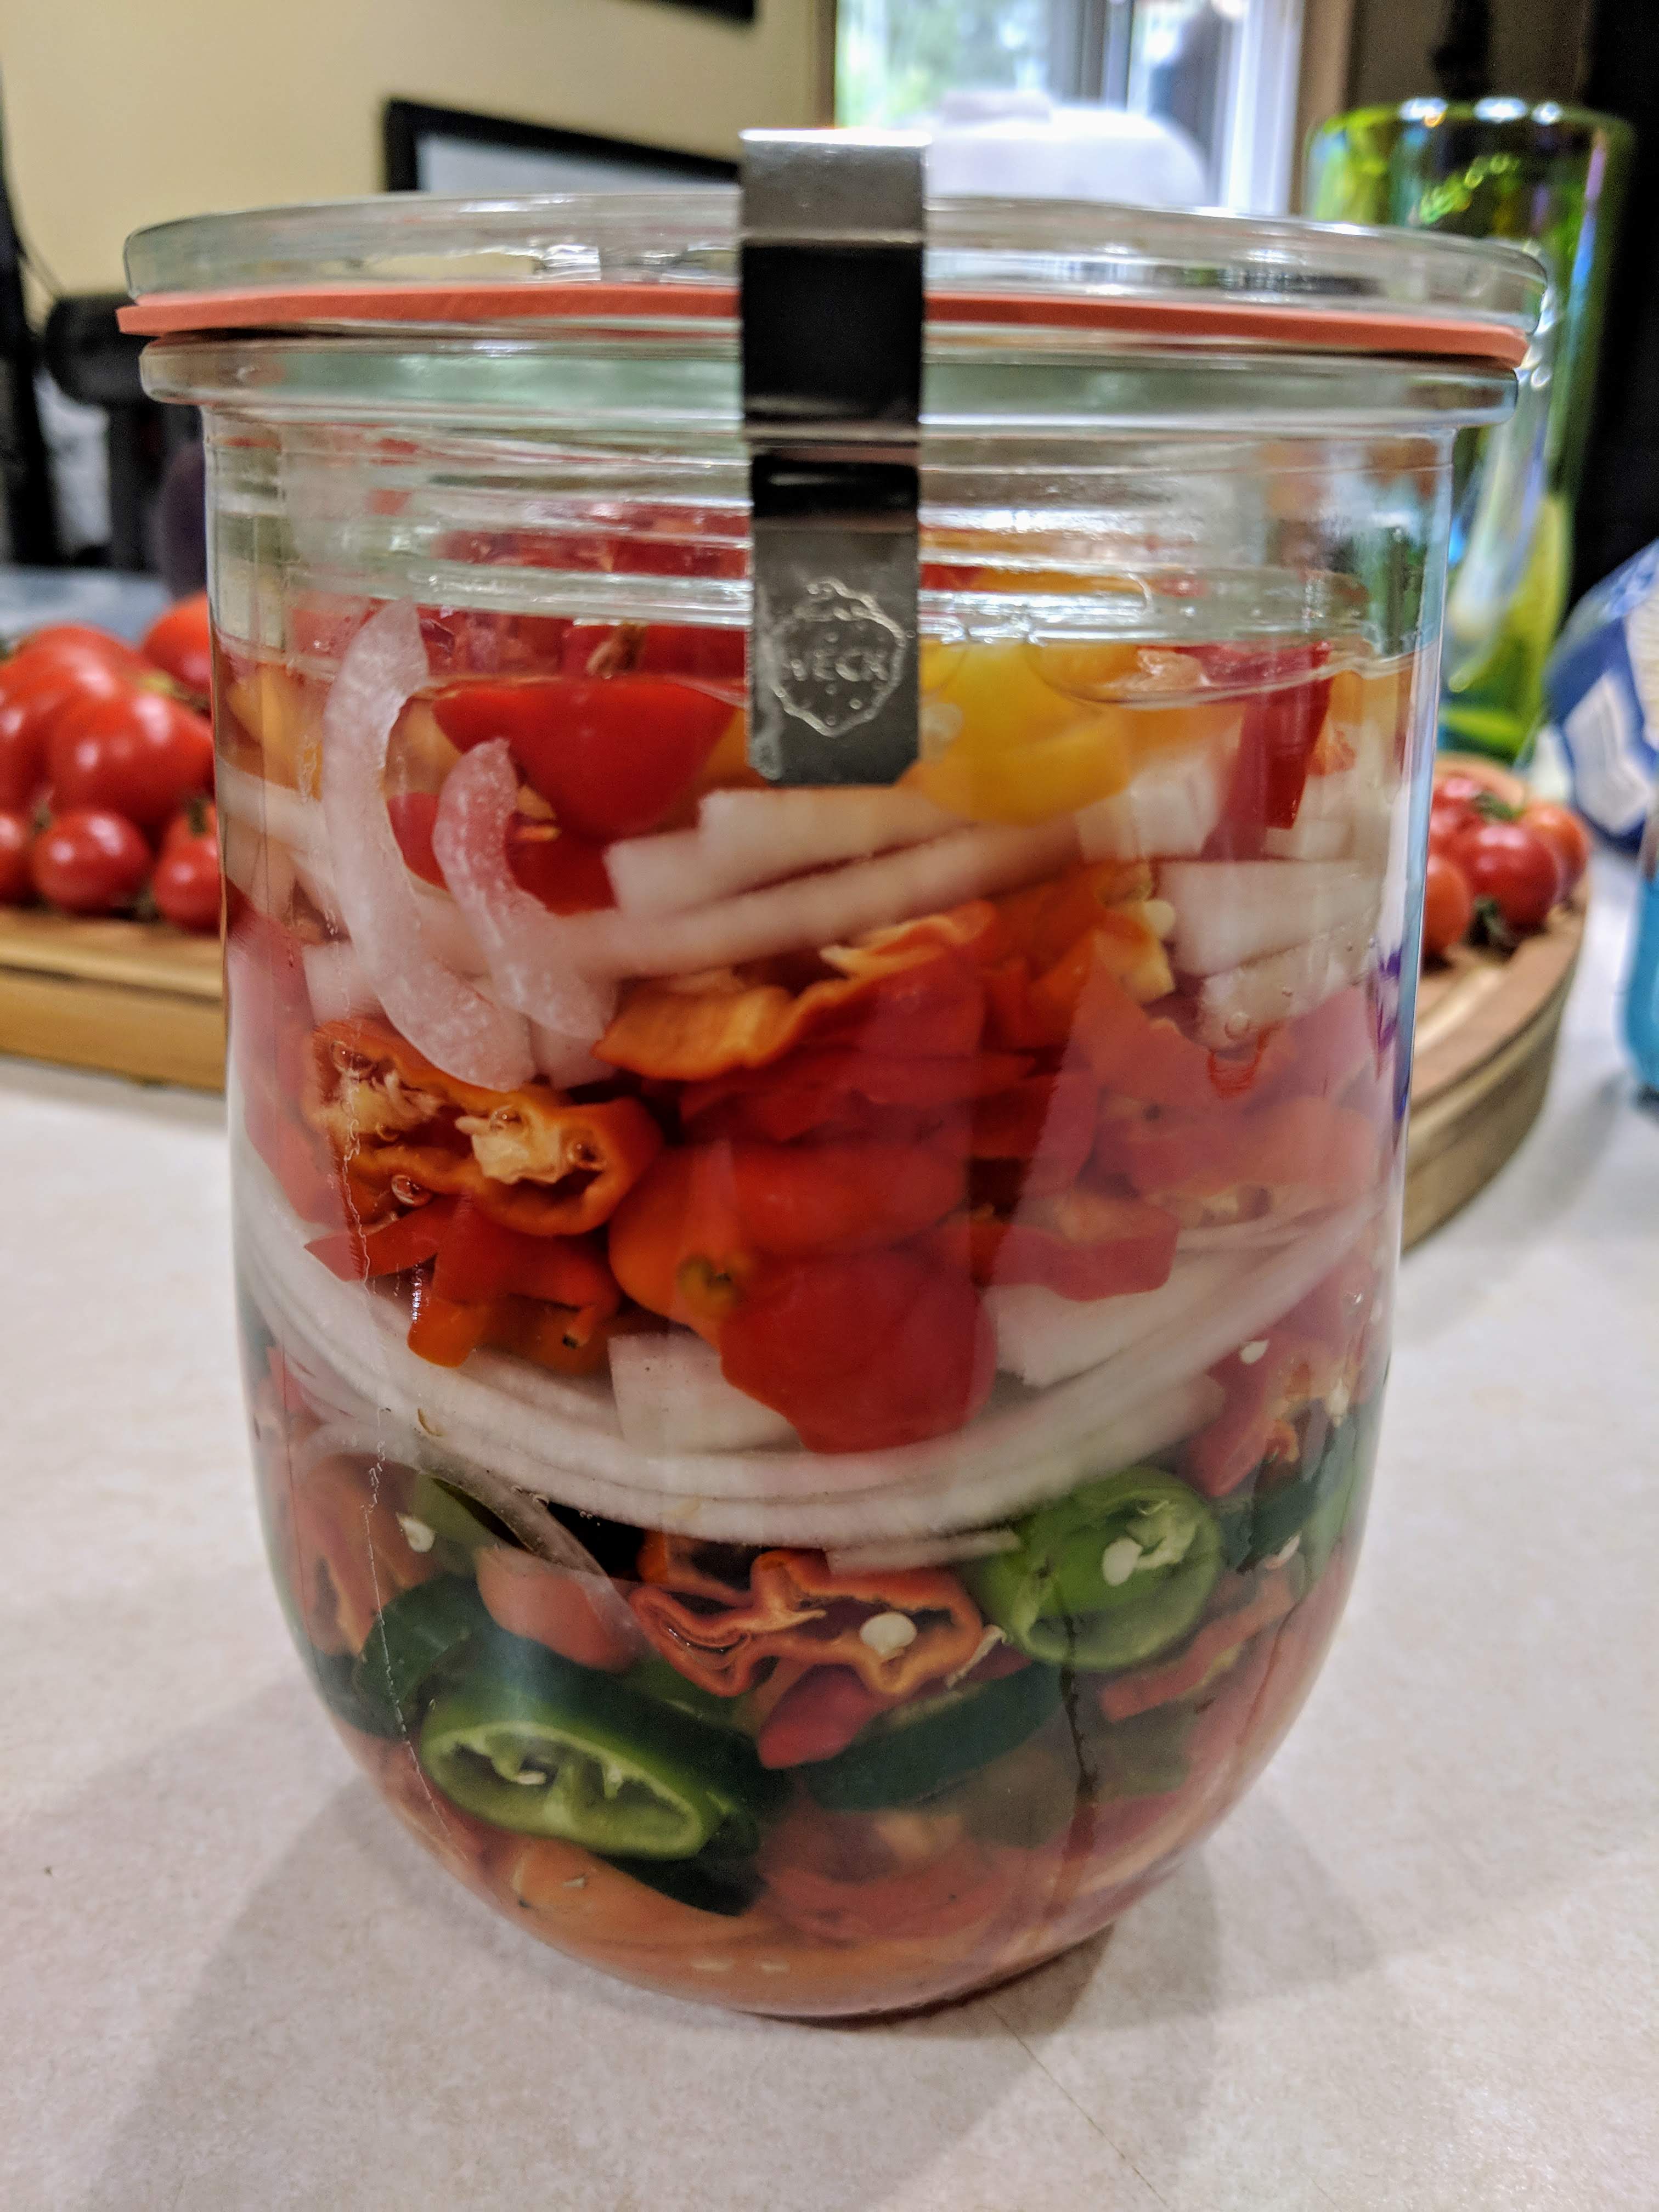
Weck Jars
For anyone who grew up canning and preserving, the classic metal-lidded Mason jar is an iconic sight. For years, it was the only system I knew. But after discovering German-made Weck jars, I’ve found a superior alternative that aligns perfectly with our homesteading values of durability and reusability.
While they have a higher upfront cost, Weck jars have proven to be an incredible investment. If you’ve ever been curious about them, here’s a breakdown of why we made the switch and how they work.
What Makes Weck Jars Different?
The genius of the Weck system lies in its four simple parts: a glass jar, a glass lid, a natural rubber ring, and two stainless steel clips.
Unlike a Mason jar, where the metal lid is a single-use item for canning, every single component of the Weck jar (except for the rubber ring, which can be used multiple times but should be replaced when it gets brittle) is reusable for decades. The glass is noticeably thicker and more durable, standing up to years of use in the kitchen and pantry.
How to Use Weck Jars for Canning
Using Weck jars is simple, but the sealing process is a little different:
Prepare: Make sure your jar, glass lid, and rubber ring are clean. Just before filling, place the rubber ring in hot water to soften it and ensure a good seal.
Fill: Place the softened rubber ring on the groove of the glass lid. Fill your jar, leaving the appropriate headspace, and wipe the rim clean.
Seal: Place the lid (with the ring attached) onto the jar. Use the two stainless steel clips to clamp the lid down firmly on opposite sides.
Process: Process the jars in your water bath or pressure canner according to your recipe’s instructions.
The “Lid Test”: After the jars have cooled completely (12-24 hours), remove the clips. This is the moment of truth. If the jar has sealed correctly, you should be able to pick the entire jar up by holding only the glass lid. The vacuum seal is strong enough to hold the weight. The tab on the rubber ring will also point downwards.
More Than Just Canning
While they excel at canning, we use our Weck jars for everything:
Fermentation: The glass lid and rubber ring create an excellent environment for ferments like sourdough starter or kimchi.
Dry Storage: They create an airtight seal perfect for storing flour, beans, and grains, and they look beautiful on an open pantry shelf.
Leftovers: They are fantastic for storing leftovers in the fridge, completely free of plastic.
For us, choosing Weck jars was a choice for quality and sustainability. It’s a system that’s built to last a lifetime, which is what homesteading is all about.
Our Go-To Weck Jars for the Homestead
Here are a few of the shapes and sizes we use most often in our kitchen:
Weck Tulip Jars: These are our favorite for pickles, ferments, and storing leftovers. The classic shape is beautiful and practical.
Weck Mold Jars: With their wide mouths, these are absolutely perfect for scooping out sourdough starter, jams, or pâté.
Weck Juice Jars: Great for storing homemade broths, juices, or for keeping milk fresh in the fridge.
Pickles
A new batch of pickles is brewing. These are the best pickles we have ever made and this method has turned out great each and every time.
5.6 % salt brine, cucumbers, fermented garlic, dill, tea bag (to keep them crisp) plus time = awesome pickles.
Taste every few days and refrigerate once they taste good to you.